ป้ายกำกับ: DIY Nail Art
Unleash Your Inner Artist: DIY Nail Art for Beginners
Have you ever looked at gorgeous nail art and thought, “I could never do that!”? Well, guess what? You can! DIY nail art is easier than you think, and it’s a fun way to express yourself.
This guide is your step-by-step journey to becoming a nail art pro. We’ll cover everything from basic techniques to more advanced designs, all with easy-to-follow instructions. Whether you’re a complete newbie or just looking to upgrade your nail game, get ready to be amazed by what you can create!
The Essentials: Your DIY Nail Art Toolkit
Before we dive into designs, let’s gather the tools you need to start your nail art adventure. Think of this as your secret weapon to creating stunning looks:
- Nail polish: Choose your favorites! You’ll need base coats, top coats, and of course, the colors that inspire your designs.
- Nail polish remover: For those inevitable mistakes (we’ve all been there!), having nail polish remover on hand is a must.
- Cotton balls: For cleaning up any spills and removing polish.
- Cotton swabs: Perfect for precise cleaning and getting into those hard-to-reach areas.
- Nail file and buffer: These help shape your nails and create a smooth surface for your polish to adhere to.
- Cuticle pusher: Keeps your cuticles neat and tidy.
- Dotting tool: A versatile tool for creating dots, lines, and even simple patterns.
- Toothpick: A surprising tool for creating intricate details, especially for fine lines.
- Tape: A great helper for creating clean lines, negative space designs, and even stripes.
Simple and Stylish: Mastering the Basics
Now, let’s get our hands dirty (literally)! We’ll start with the fundamental techniques that are the building blocks for more complex designs:
1. Base Coat: This is your foundation. Apply a thin layer of base coat to protect your nails and prevent the polish from staining them.
2. The Perfect Polish: Here’s the trick to a smooth finish:
* **Thin Coats:** Apply your polish in thin layers. Too much polish at once can lead to smudging and uneven coverage.
* **Wait for it:** Let each layer dry completely before applying the next.
* **Clean Up:**  If you get any polish on your skin, use a cotton swab dipped in nail polish remover to carefully clean it up.
3. Top Coat: The final touch! A top coat seals in your design and gives it a glossy, long-lasting finish.
4. Dotting Technique: The dotting tool is your best friend for adding those cute polka dots, creating flower petals, and more. Here’s how:
* **Dip and Dab:**  Dip the tip of your dotting tool in the polish of your choice.
* **Placement is Key:**  Use a light hand to create dots of different sizes.
* **Mix and Match:**  Experiment with different colors for a playful and unique look.
5. Tape Magic: Tape isn’t just for wrapping presents! It’s also a fantastic tool for creating crisp lines and geometric designs.
* **Cut and Stick:**  Cut thin strips of tape and place them on your nails to create the shapes you desire.
* **Color It In:**  Paint your nails with your chosen colors.
* **Peel and Reveal:**  Carefully peel off the tape once the polish has dried to reveal your design.
Level Up Your Nail Art: Exploring More Designs
You’ve mastered the basics, now it’s time to explore the exciting world of nail art! Here are a few ideas to get you started:
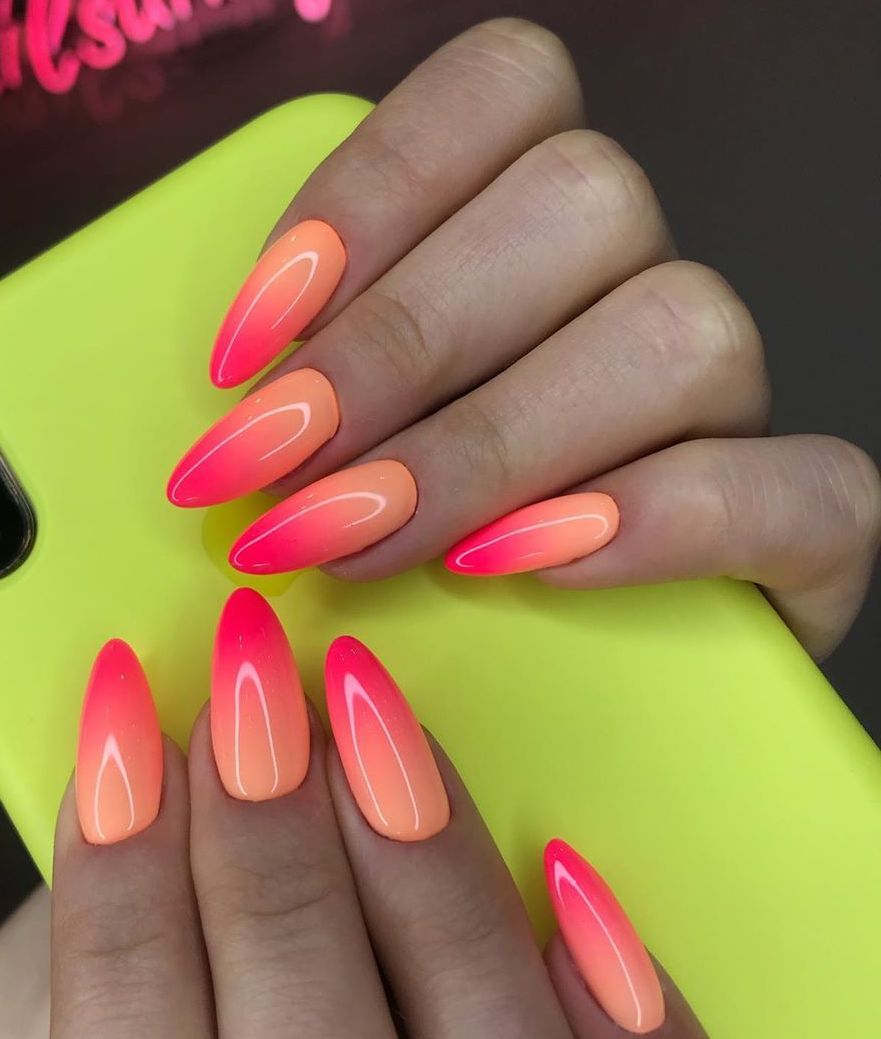
1. Ombre Nails: Create a seamless gradient effect with a gradual transition of colors. This technique can be achieved with a sponge or by blending colors with a brush.
2. Negative Space Designs: Leave a portion of your nail bare to create a striking contrast and a minimalist aesthetic.
3. Geometric Patterns: Use tape or freehand drawing to create geometric designs like stripes, triangles, and squares.
4. Floral Designs: If you’re feeling creative, you can hand-paint delicate flowers, leaves, or intricate patterns.
5. Glitter and Sparkle: Add some extra bling to your designs with glitter polish, rhinestones, or even holographic flakes.
6. Nail Stickers: These pre-made designs come in various shapes, sizes, and styles, allowing you to achieve intricate looks without the hassle of hand-painting.
Keep Practicing and Have Fun!
Remember, practice makes perfect. Don’t be afraid to experiment and find what works best for you. There’s no right or wrong way to do nail art – it’s all about expressing your own unique style.
So grab your tools, choose your favorite colors, and let your creativity run wild! You’ll be surprised at the amazing nail art you can create with a little effort and a lot of fun. And if you get stuck, there are tons of tutorials and inspiration online – just search “DIY nail art” and you’ll find a whole world of creative ideas!
Important Note: Before using any nail polish or other nail products, it’s essential to check for any allergies or sensitivities you might have. Always patch test a small area of your skin before applying it to your entire nail.
Secondary keywords: DIY nail art, ombre nails, negative space nails, geometric nail art, nail art designs.